Sephiria Beginner Guide
How a Sephiria run is actually built — why the inventory grid is the build, what each node icon means, and what your first deaths are meant to buy you.
Community sourcesCurrent for 1.0.33
GamePrimer EditorialUpdated Verified
Stop asking whether a reward is good and start asking where it goes. Artifacts take up cells in your inventory; Tablets are laid over those cells and raise or lower the level of whatever they cover. Two Artifacts you can arrange beat three you cannot.
The run in one paragraph
You pick a costume, which sets what you start with, and climb a tower. Each floor opens in a starting room, offers you a choice of three nodes, and ends in a boss room — then the next floor does the same. You die, you spend what the run earned on permanent upgrades, and you climb again. There are six chapters, six weapon branches with over fifty upgrades each, and somewhere north of sixty enemy types and ten bosses in the finished game.
None of that is what decides your run.
Your inventory is the build
Artifacts are not a list of bonuses. They are objects that occupy cells in a grid, and Tablets are a second kind of object laid across that grid.
Each Tablet has a footprint. The cells it covers get an Artifact Level change — some cells raise the level of whatever Artifact sits there, some lower it — and you can rotate the Tablet to point that footprint somewhere else.
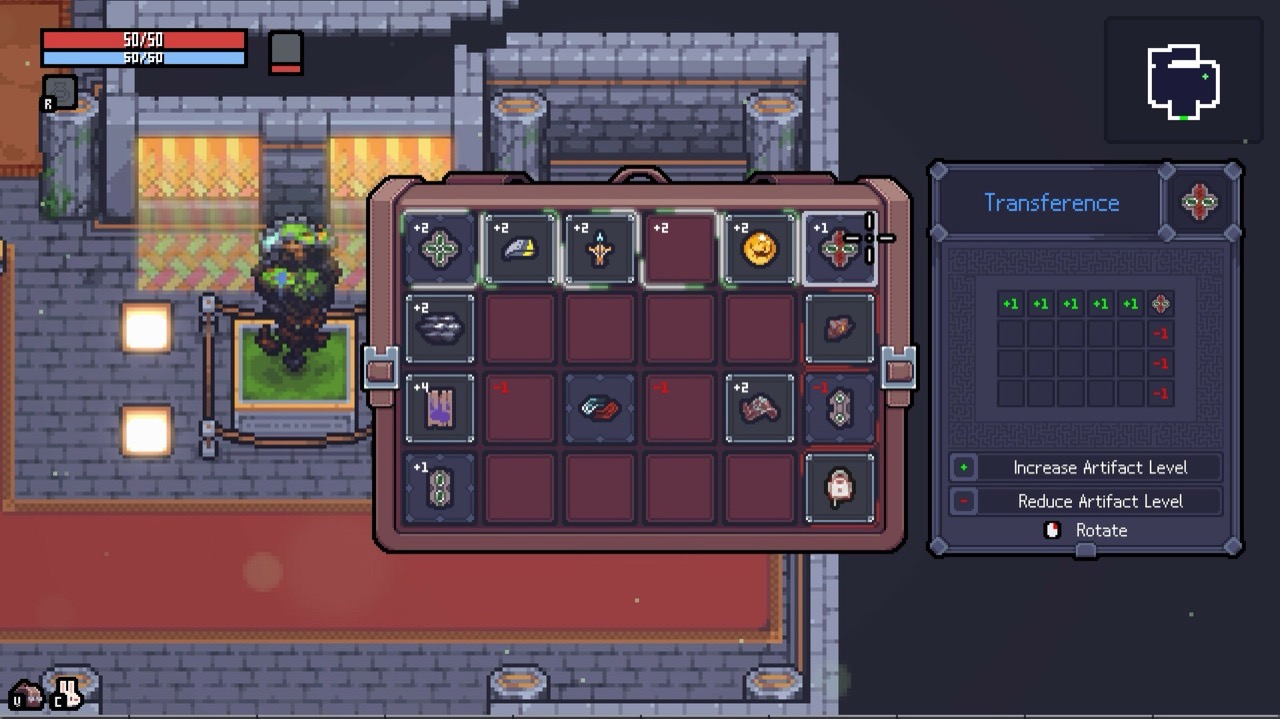
That single mechanic is the whole game. A strong Artifact sitting under a red cell is a weak Artifact. A mediocre Artifact sitting under three green cells is not mediocre any more. When you are offered a reward, the real question is whether there is a cell for it that does not cost you something you already have placed well.
There is one release valve: the Side Bag, added in 1.0 and unlocked through the Destiny Inscription, holds spare items. Anything in it is inactive — it is storage, not a bigger grid.
Combos are why the layout compounds
Artifacts carry tags, and carrying enough of one tag turns on a Combo. Combos step up at thresholds rather than scaling smoothly, so the difference between five and six tagged Artifacts can be the difference between a run and a clear.
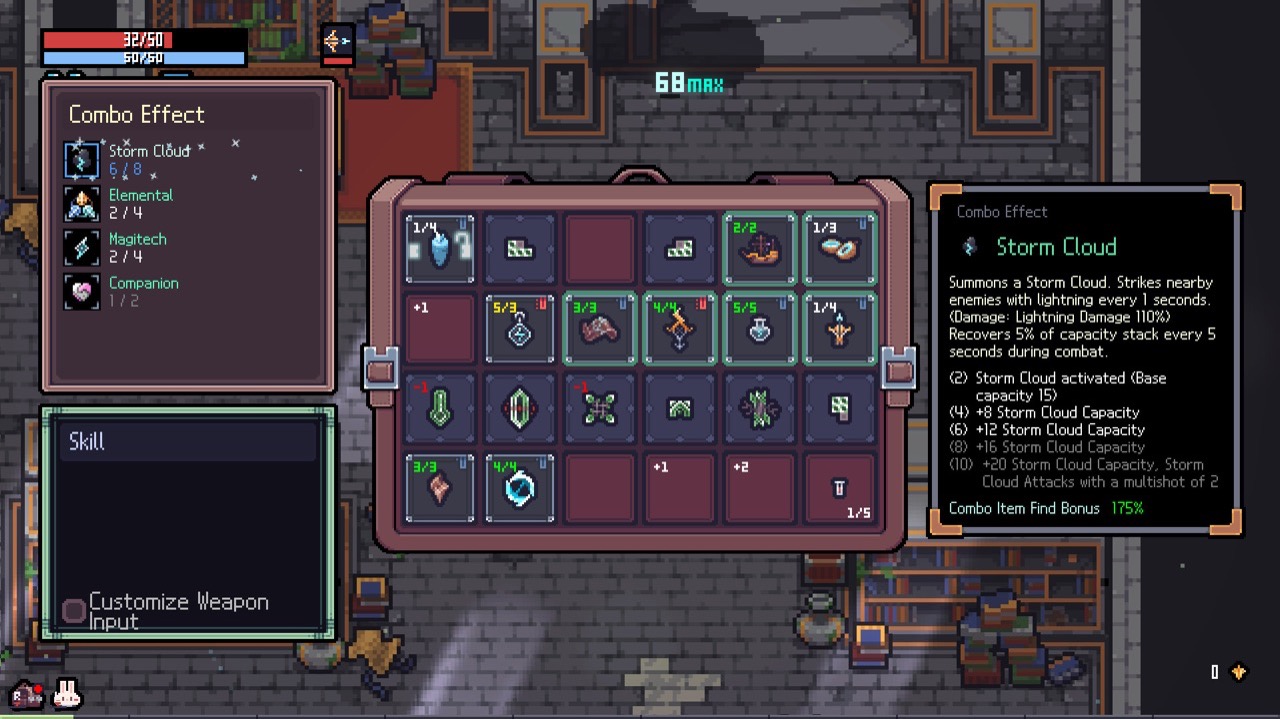
Read the panel on the left before you take a reward, not after. It tells you which Combo you are closest to completing, and completing one is almost always worth more than the raw stats on a different Artifact.
Reading the node row
Every floor asks you to pick one of three nodes and give up the other two. The icon on top says what the node contains; the icon underneath says what has been done to it.
The list is Communitydocumented by players — TEAM HORAY has not published one.
| Node | What it holds |
|---|---|
| Artifact | A room with an Artifact choice |
| Tablet | A room with a Tablet choice |
| Anvil | Weapon upgrades |
| Enchantment | An altar that raises an Artifact’s level, usable a set number of times |
| Level Up | A light at the exit of the first room that levels you instantly |
| Green Heart | A permanent increase to maximum HP |
| Money | A box of currency |
| Shop | A merchant, with a thinner selection than the fixed shop on the floor’s starting room |
| Dice | Two dice — only appears once you have unlocked it through the Destiny Inscription |
| Tree Roots | A Miracle. Appears once per run, and never shares a node with anything else |
And underneath, the modifiers:
| Modifier | What it changes |
|---|---|
| Common | Nothing |
| Derangement | Enemies in this node are randomly enhanced |
| Mini Boss | The floor’s mini boss appears as well, and drops an Artifact worth having |
Some rooms are not signposted on the map at all — arenas, obelisks, fountains, blood donations, wandering merchants, the Pocket Dimension. You find those by walking into them.
One caveat on this table: 1.0 added at least one new purchasable object that is not in it, so treat the list as the documented node types rather than a complete census.
Rewards you are allowed to refuse
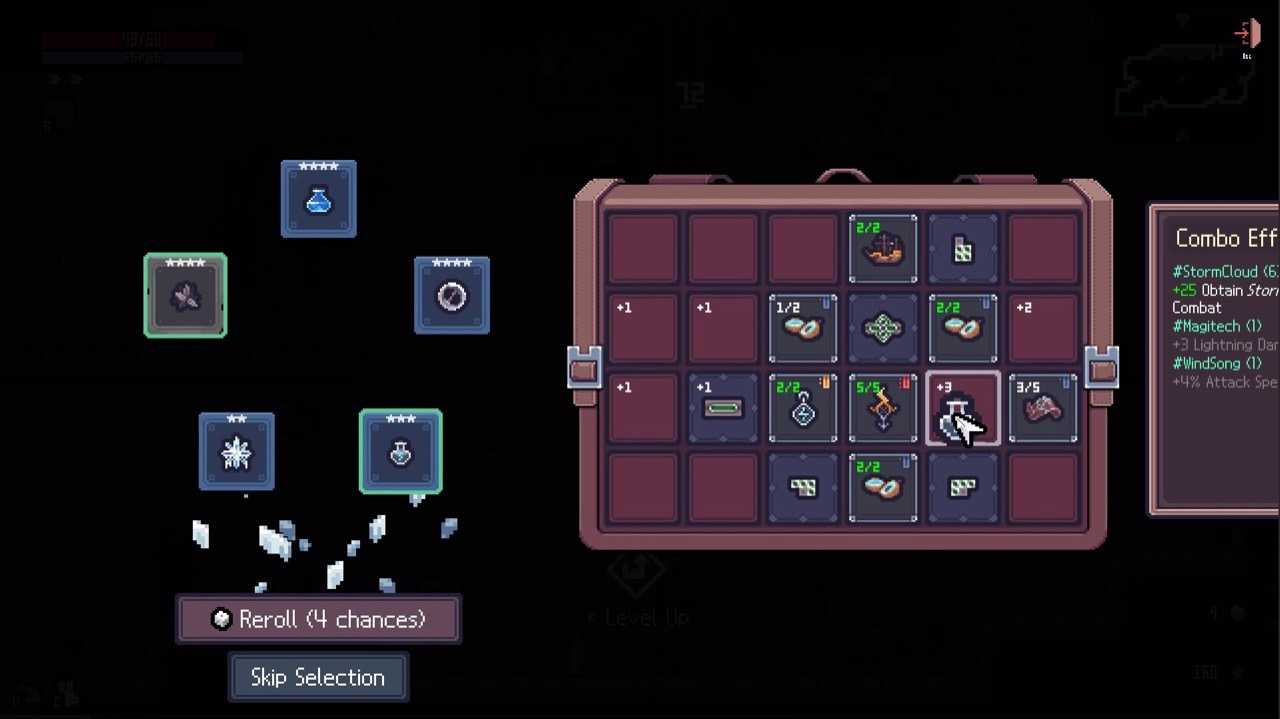
You get a limited number of rerolls, and you can decline the whole offer. New players almost never skip, and it costs them: an Artifact taken because it was free, then placed wherever there was room, drags the whole layout out of shape.
The Mystic Pot is the other escape hatch. Since 1.0 it converts one Artifact into a different one of the same rarity, or two Artifacts into one of a higher rarity — which is what to do with the ones you took and could not place.
What your deaths are for
Dying is the currency loop, not a failure state. You come out of a run with Sapphires, and how many depends on how far you got and how many bosses you killed on the way. Sapphires buy nodes on the Destiny Inscription, the permanent upgrade tree, and they are also the currency inside the Pocket Dimension during a run.
The tree unlocks along paths — you have to buy into a node at least once before the next one down the line becomes available — so early Sapphires are better spent widening access than deepening one branch you already have.
Four things that catch people out
- A reward you cannot place is not a reward. Skip it, or run it through the Mystic Pot.
- The Side Bag does nothing for your build. Items in it are inactive. It is a shelf.
- The fixed shop is on the starting room of every floor after the first. It is a better selection than the shop nodes, and it is free to visit.
- The Journal is genuinely good. Since 1.0 it also holds a Tutorial section that replays anything you have already been shown, which is faster than most of what is written about this game — this page included, for anything mechanical.
Related
- How to find secret rooms — free rewards you are walking past
- How to solve the Ark tablet puzzle — the side quest most people stall on
- Sephiria Patch Notes — the combat rules have moved twice since launch
Sources
- OfficialSephiria on Steam — strategic inventory, six weapons, chapter and enemy counts
- Official1.0 Update — Side Bag, Mystic Pot rework, 1.0 content totals (31 Jul 2026)
- CommunityBasic Guide to Sephiria — floor structure, node types, Destiny Inscription, by FireBrother
